Hello! We are in the process of preparing something that we're sure our users will love: an Ultimate Guide to Genestack Platform. We built Genestack to be intuitive and easy to use, but we recognize the fact that some of our users don't have much experience with bioinformatics and could use a little bit of extra help. The seasoned bioinformaticians will also find the guide useful: it contains answers to all questions you might have about our platform. Before we publish the full guide, we'll post extracts from it in a form of blog posts. You might expect advice on how to choose an appropriate mapper, reference genome etc. or simply more information on a specific, commonly used app. In this extract we will talk about building pipelines and results reproducibility. Sometime ago we posted Whole Genome Sequencing Analysis tutorial. In this post we'll use the same experiment (Human Sapiens Genome Sequencing and Variation by Dogan et al.) to show you how to build a pipeline and how to reproduce your results or replay an exact analysis on different set of data. Building a pipeline Let's create a pipeline containing the following apps: Trim Adaptors and Contaminants, Trim Low Quality Bases, Filter by Quality Scores, Unspliced Mapping with BWA, Remove Duplicated Mapped Reads, Variant Calling, Effect Prediction. The easiest way to do this is to first select the files of interest (in this case let's go for the two samples from the experiment), right click on them and select the first desired app from the context menu.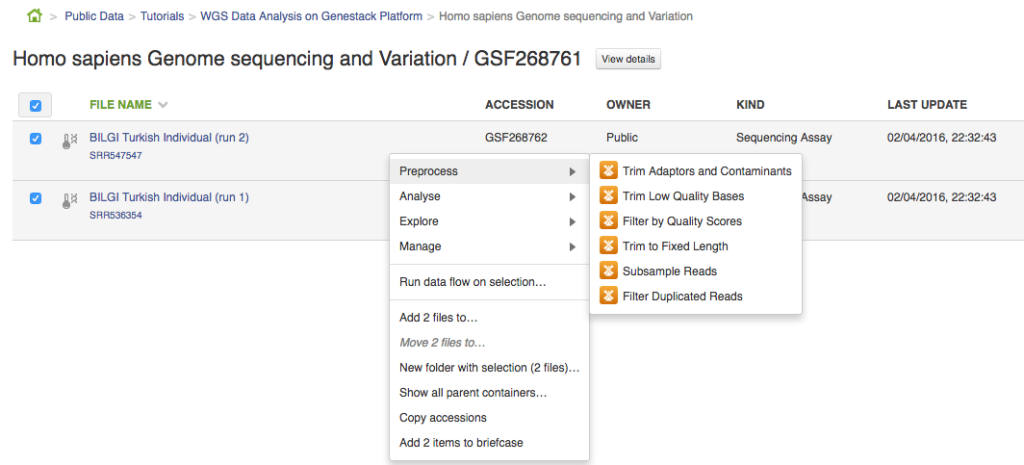 This will take you to the app page where you can either start initialization of the created file or use this created file as an input for other applications. In order to create a pipeline, we will use the latter.
  Clicking on "Add step" button with give you a list of all suggested apps that can be used on this file. Remember that you can view and edit app parameters by clicking on "Edit parameters" button. Continue adding steps until you reach the last app. File Initialization One of the key concepts of the platform is a difference between creating and initializing files. When you build a pipeline, the computations do not start automatically. Instead, all the participating apps create files. For instance, when you first used Trim Adaptors and Contaminants app, this created two files (trimmed sequencing assays). When an application creates a new file, it specifies what should happen when it is initialized: a script, a download, indexing, computation. However, before the initialization has begun, you can change the parameters, replace source files, or add more files to the pipeline. In practice it means that uninitialised files are cheap and quick to create, can be configured, used as inputs to applications to create other files, and then, later, computed all at once. Remember - you always need to initialize your files. Once you do, any further changes become impossible. Let's go back to our pipeline. Now, that it contains all your desired steps, you can do a couple of things: you can initialize the computations or you can create a data flow to re-use this pipeline in the future. Let's start with pipeline initialization:
 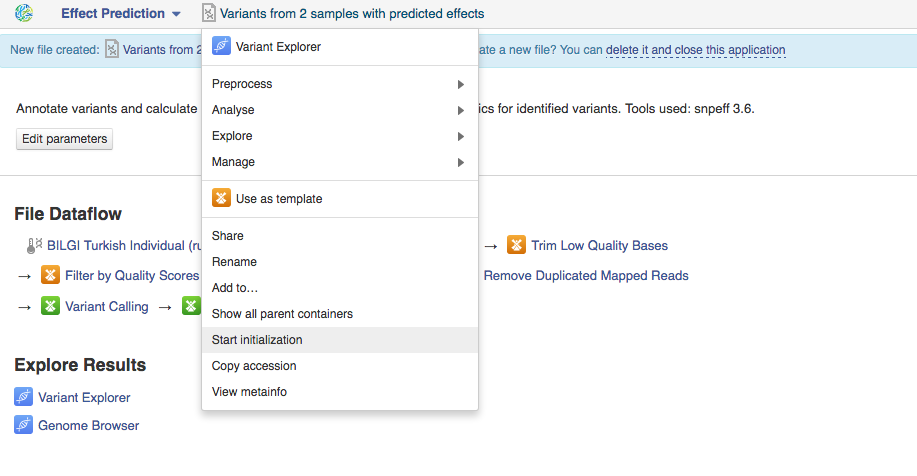 You can run the analysis by clicking on the name of the last created file and selecting "Start initialization".
 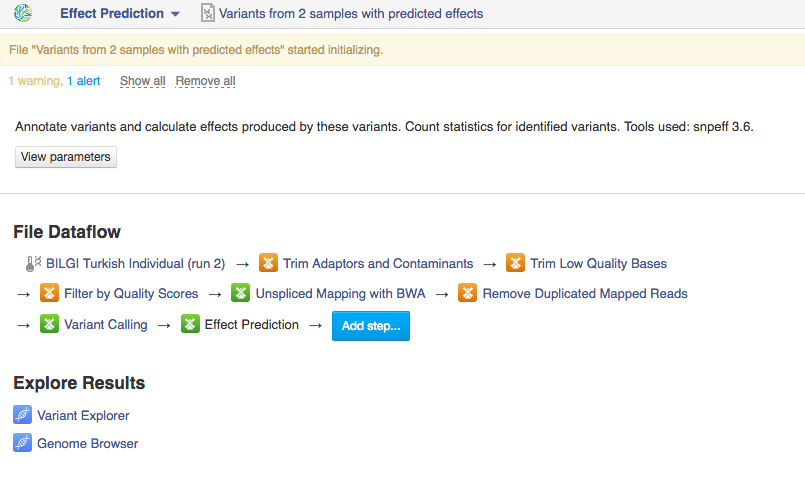 Once you do that the system will report that your files have started initializing and you can track the progress of your task using Task Manager (to go to Task manager click on "Tasks" in the upper right corner). Creating Data Flows The second thing you can do here is create a data flow. Data flows are visual representations of bioinformatics pipelines that can be used over and over again to use the same pipeline (with identical parameters) to analyse various sets of data. You can find general information on data flows and how to use them in the Getting Started tutorial. To create a data flow, clikc on the name of the last created file, go to Manage and select "Create new Data Flow".
 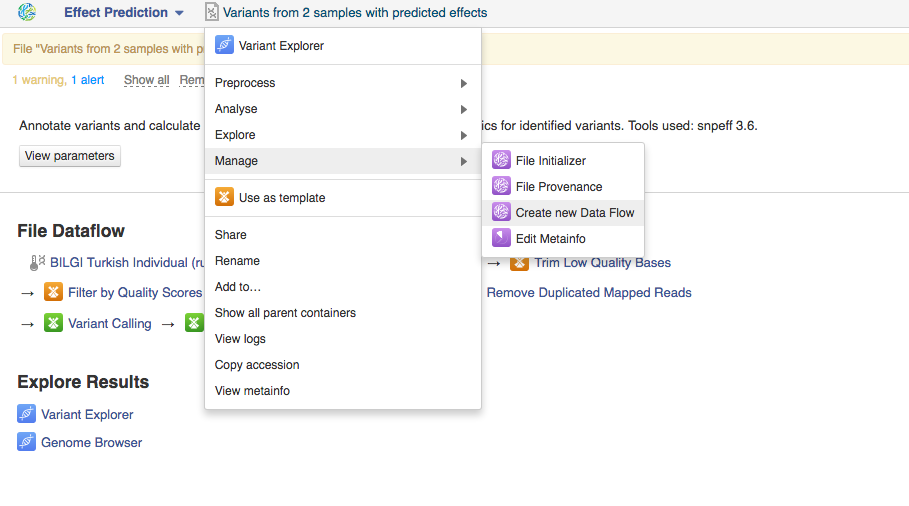 This will take you to the Data Flow Editor page
 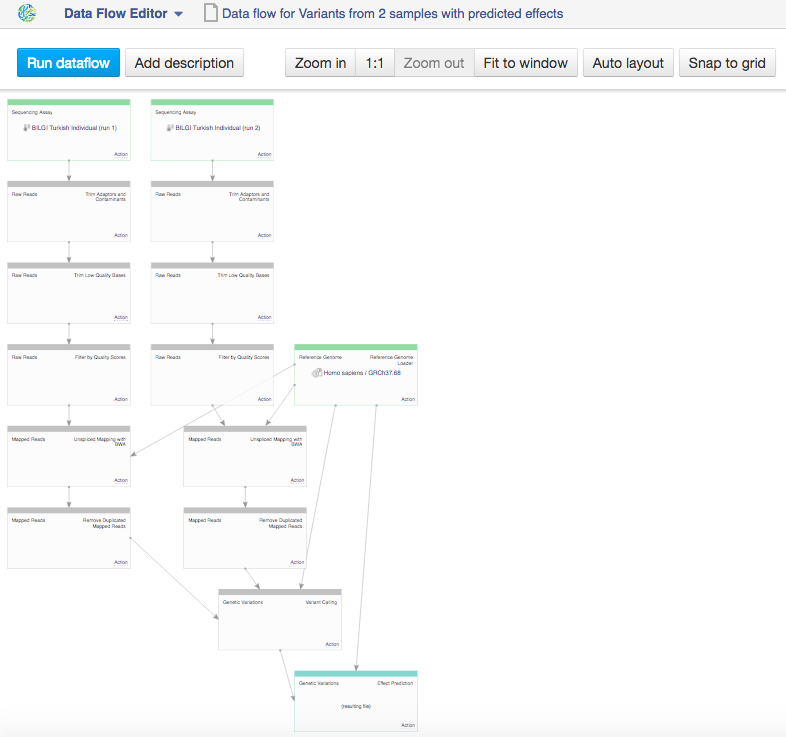 In the data flow, you can see the sequencing assay input, the reference genomes and all apps that you included in the pipeline. Because we chose two inputs, the data flow looks rather complicated. Let's use the "Merge parents" option to make it more simple. Click on "Action" in Genetic Variation cell and go to "Merge parents".
 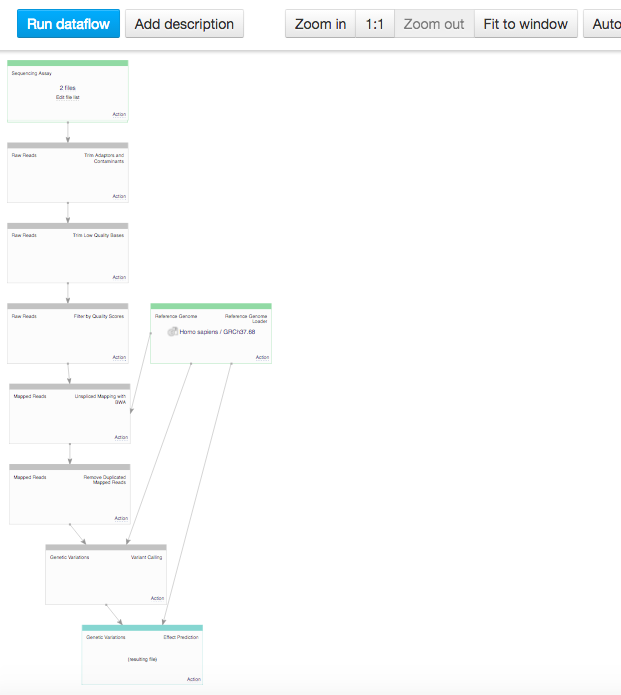 You can use zoom in/out buttons to see the individual parts of the data flow. You can describe your data flow by clicking on "Add description". You can change the name of the data flow by clicking on the name of the file (top of the page) and selecting "Rename". Your data flow is ready and you can find it in the Created files folder. Let's now use it on a different set of data. First of all, we need to update the input files. In the Sequencing assay cell, go to "Edit file list".
 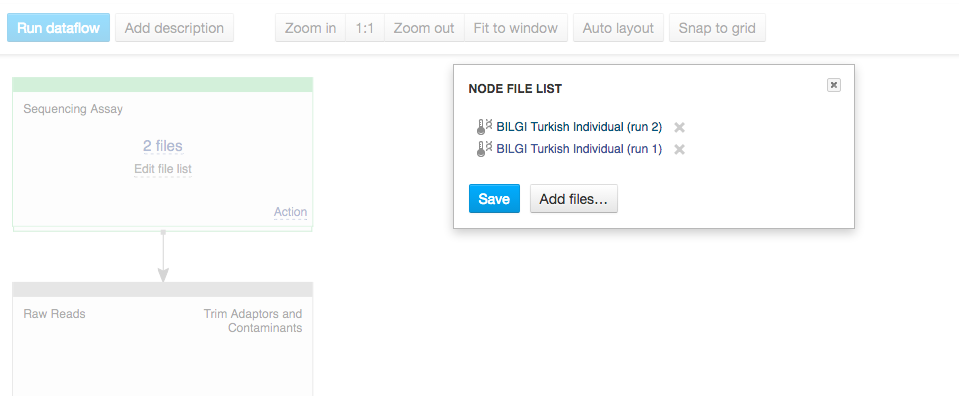 Delete the old input files and go to "Add files" to select new ones. Go to "Public Experiments" and select three top files from "Mus musculus Genome sequencing" experiment.
 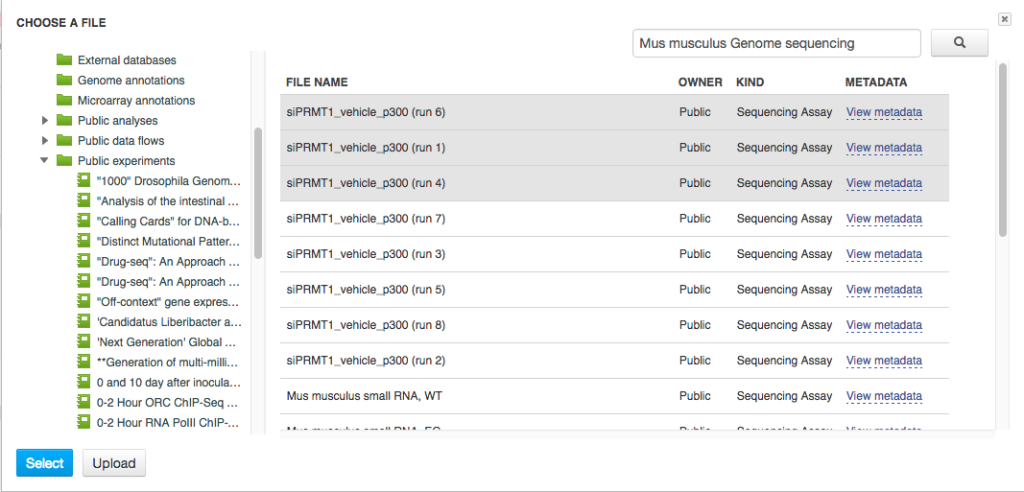 Since we are no longer working on human genomes, we also need to change the reference genome to mouse genome.
 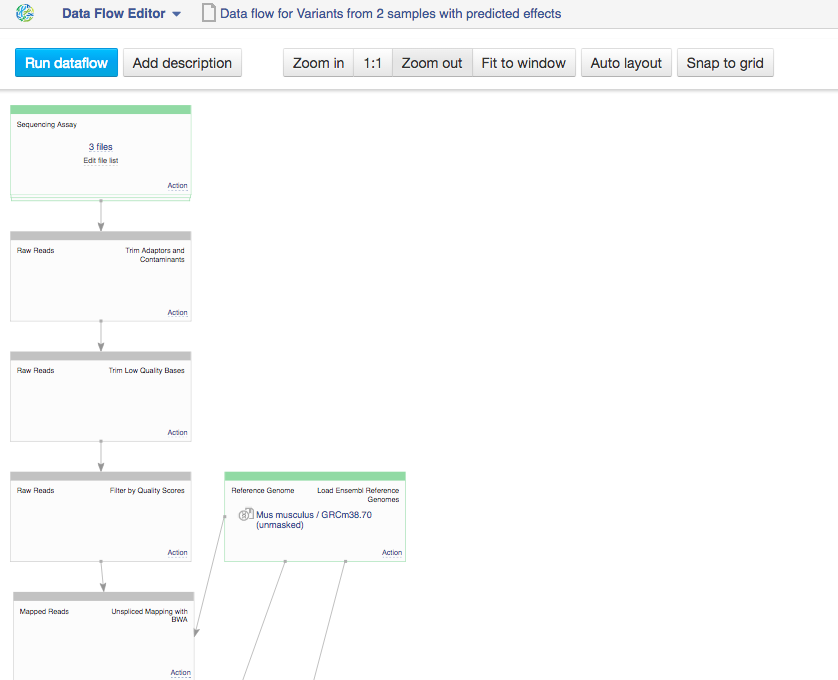 Clicking on the blue "Run Data flow" button will take us to the next page: Data Flow Runner. To create files click on "Run Data Flow" button at the bottom of the page. On the next page the system will ask you, if you want to start initialization now or delay it until later.
 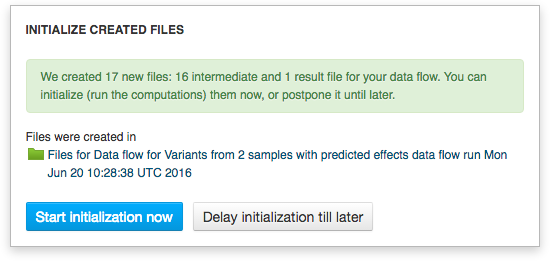 Remember, once you start initialization, you can't introduce any more changes into your pipeline. Before initializing the computations, you can still change the app settings. In order to do this click on the name of the app in the correct cell, which will take you to the app page.
 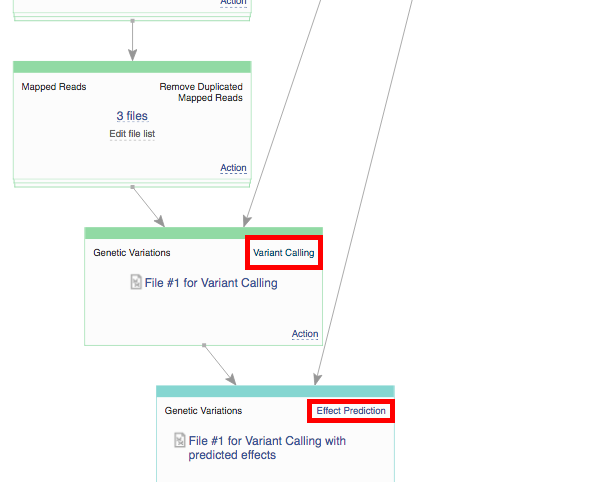 On the app page you can use the "Edit parameters" option to view and change the settings. If you decide to delay initialization till later and introduce some changes, here is how you initialize you files when you are ready. Click on the name of the last created file (in the bottom cell) and select "Start initialization".
 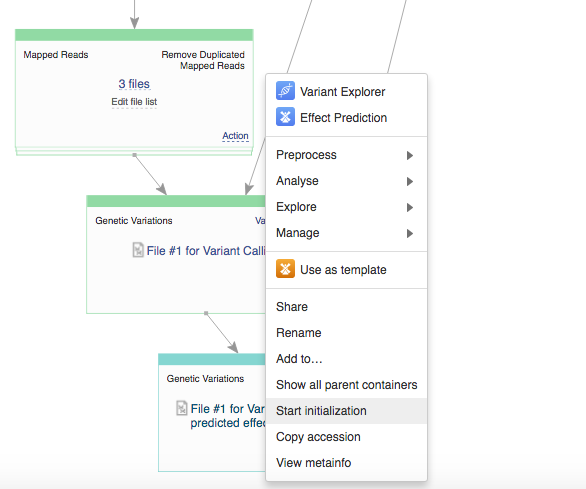 After the initialization has begun the settings can no longer be changed. All settings are carefully recorded and all files created on Genestack "remember" how were they created. You can always track the progress of your initialized tasks using the Task Manager that can be found on the top of the page.
 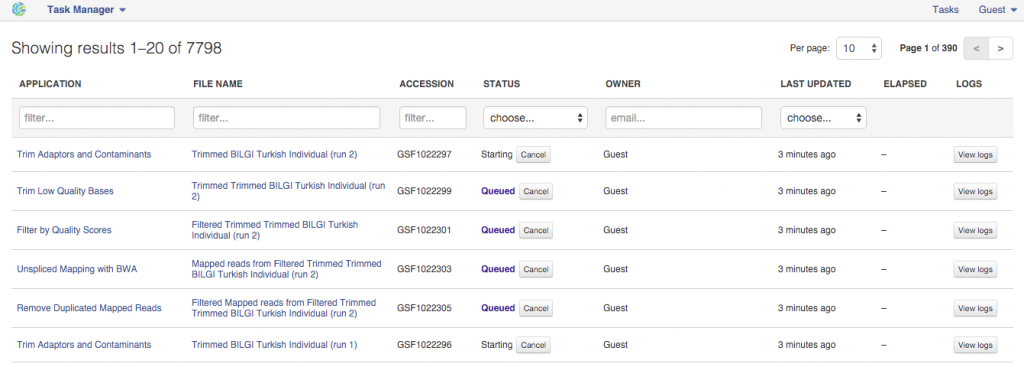 Public Data Flows On top of re-using your computations, you can also use Public Data Flows prepared by our team. You can access them from the Welcome Page or from File Manager. You'll find data flows covering most common analysis types (e.g. Differential Gene Expression Analysis) as well as data flow used for data quality checks etc. We hope you found this piece of the guide useful. Please let us know what you think in comments. If you have any questions and want to talk to our team - you can use the chat while using the platform or email us at contact@genestack.com.
Using LLMs in Life Sciences
In this brief article, the first of a series of three brief articles, we share some of our direct experience using Large Language Models (LLMs) in life science R&D.
Mar 22. 2024